
Use this, not that: Exterior sheathing
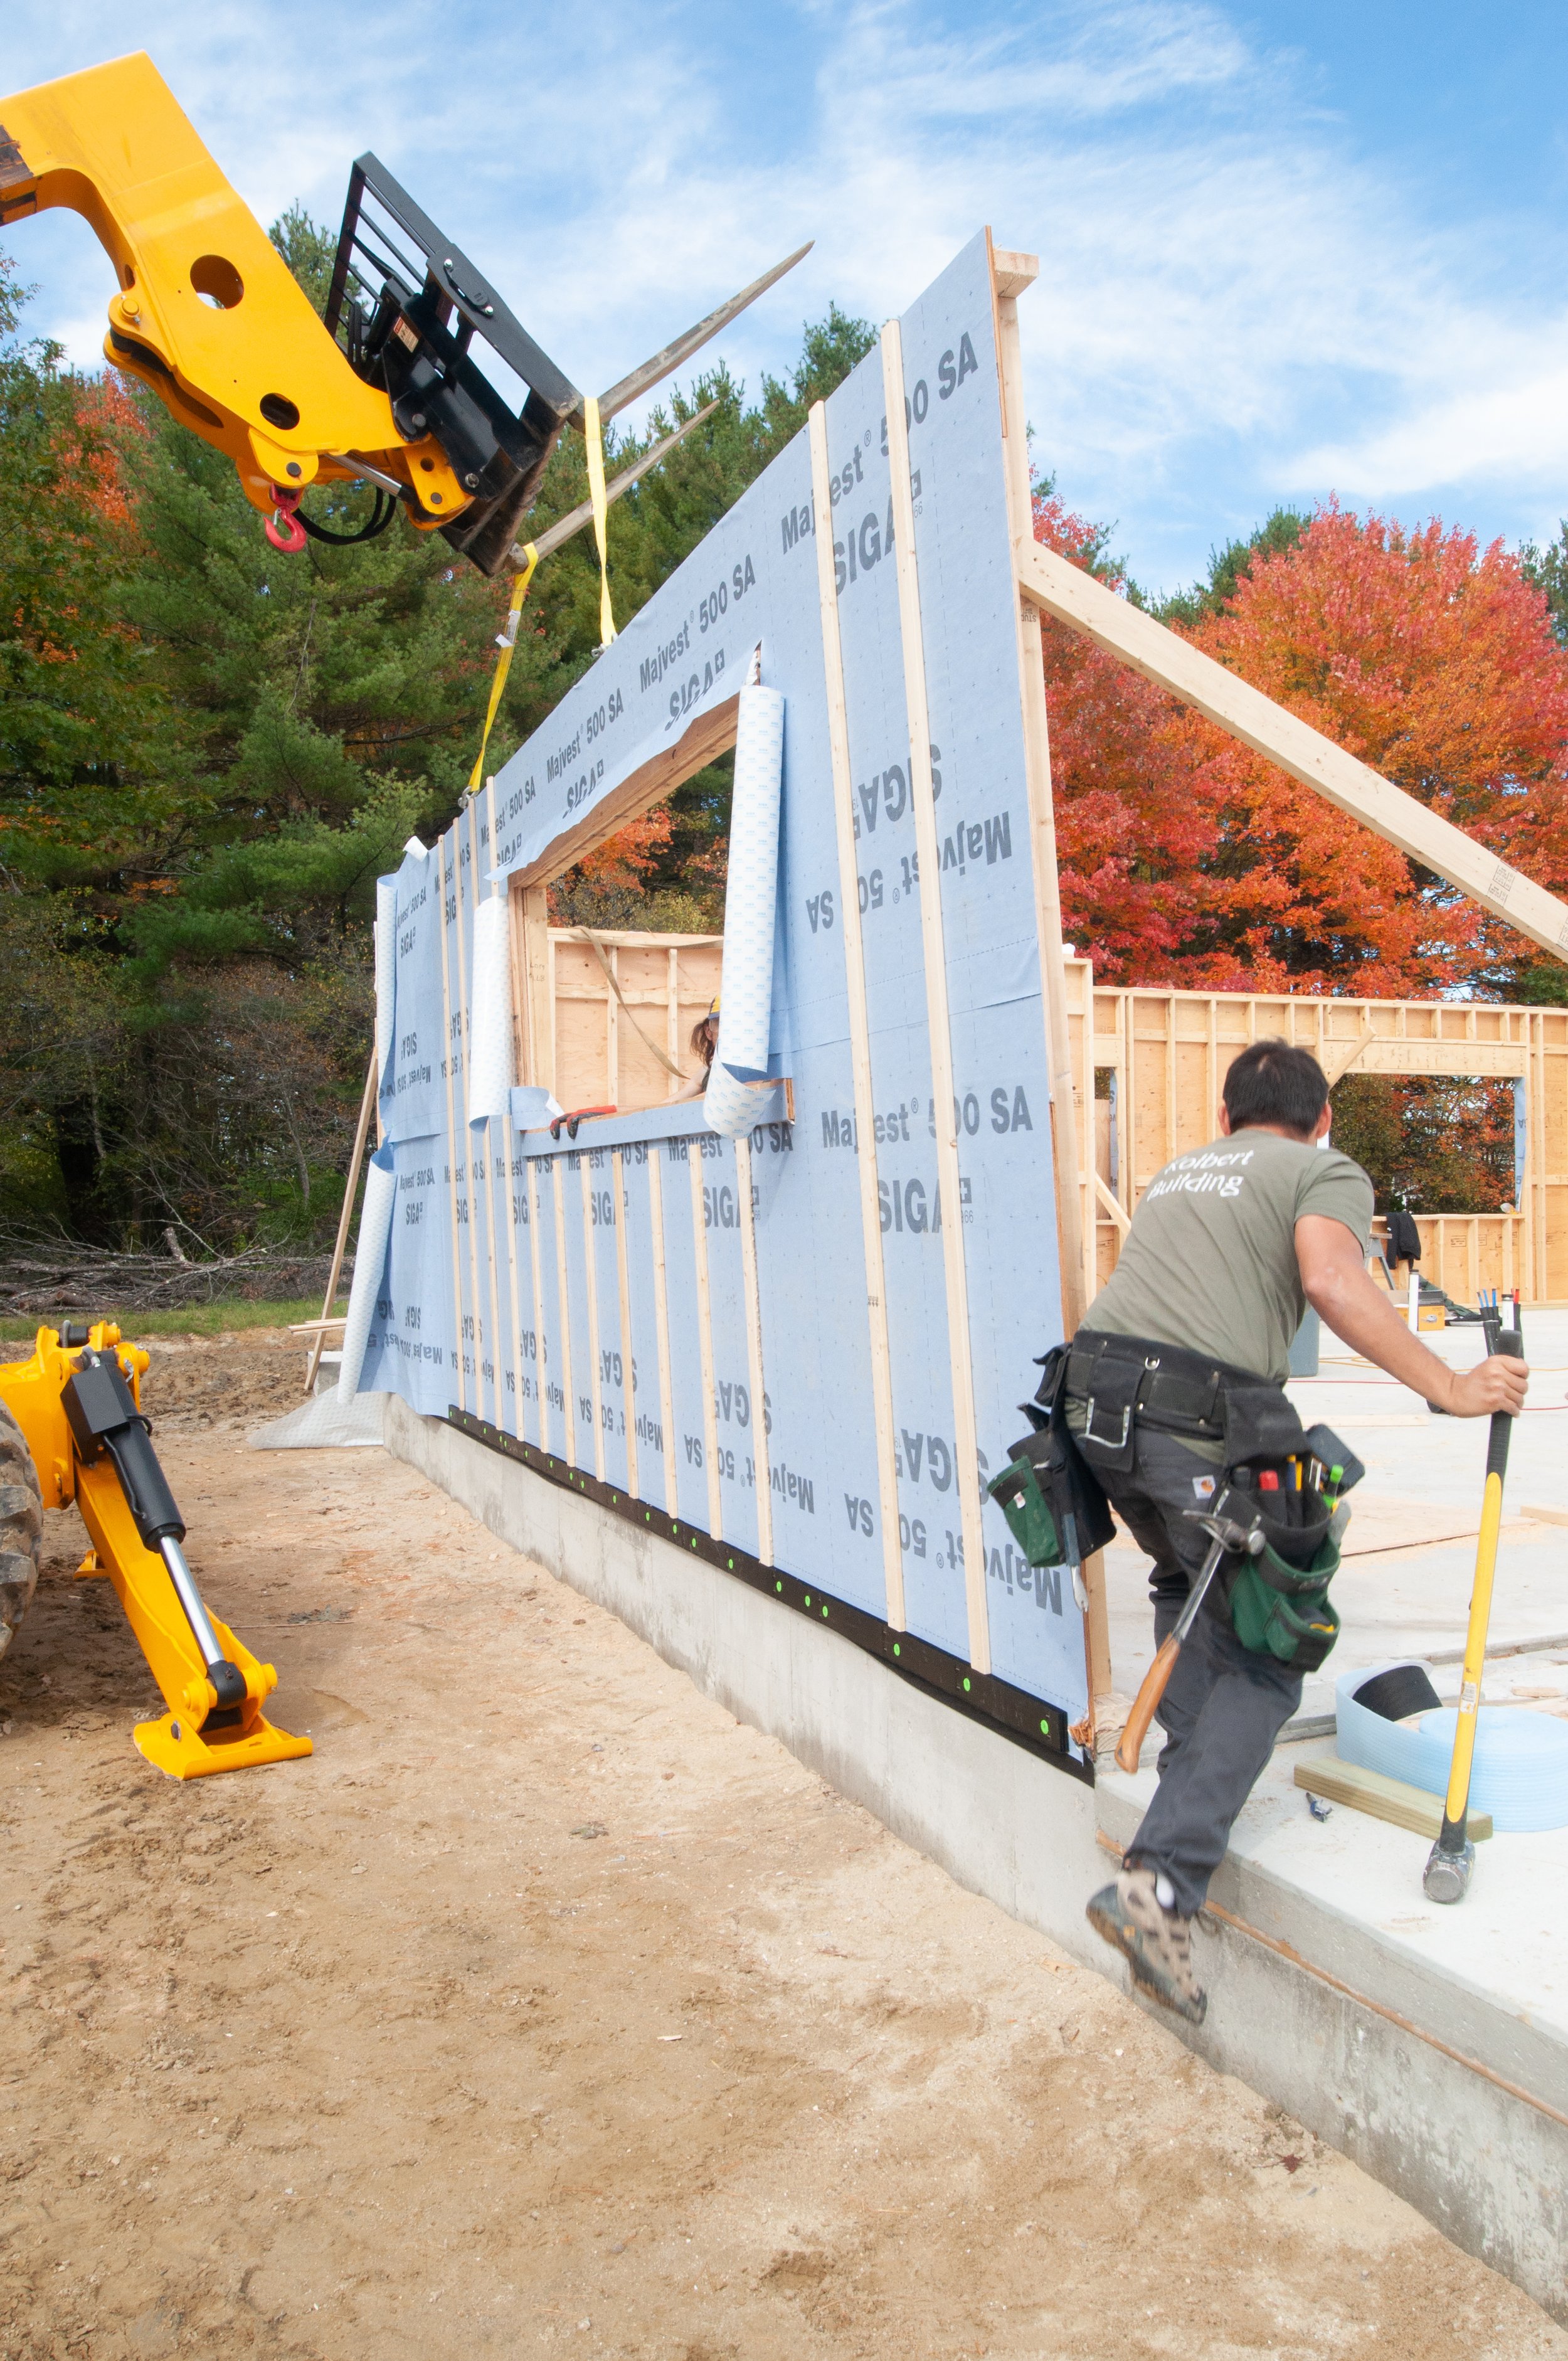
The outer section of a double wall assembly at a Kolbert Building job site: 2x4 studs, 1/2” CDX plywood, self-adhered SIGA Majvest® as both the air and weather barrier, 1x3 spruce strapping as rain screen, and Cor-a-vent® SV-3 Siding Vent to keep bugs and critters out. PHOTO: SCOTT GIBSON.
By Steve Konstantino
MOST HOMES IN MAINE ARE BUILT with wood framing and use some type of sheathing on the exterior (or sometimes interior) of the wood frame. The frame usually consists of 2’x4’, 2’x6’ or 2’x8’ studs (or doublestuds) arranged in a particular grid pattern. This forms the walls and roof and provides the “skeleton” of the house. The sheathing typically wraps around the exterior to provide one of the “skin” layers. This layer has a few purposes.
Sheathing may be either structural or non-structural.
Structural sheathing ties into the wood framing to add strength to the frame so it does not bend or shift under loads. Engineers calculate shear loads, wind loads and roof/snow loads to ensure that the frame will stay up under these stresses. The sheathing helps manage these loads by connecting the studs to each other. The sheathing also works as a base to attach siding and add support to the siding material.
Structural sheathing types include plywood, OSB (oriented strand board), Huber’s ZIP System® sheathing (OSB coated with a weather-resistant green or orange layer), diagonal wood boards (tongue-and-groove, shiplap, square edge, pine or fir), and wood fiberboard.
Non-structural sheathing is attached over a framed wall that has some other type of bracing to manage the loads and keep the frame in place. Sometimes this type of sheathing is used on top of structural sheathing. These types are often used to add insulation value to the wall or roof system or, sometimes, fire resistance.
Non-structural sheathing types include include gypsum, wood fiberboard, and rigid foam, which includes expanded polystyrene (EPS), extruded polystyrene (XPS) and polyisocyanurate (polyiso).
Weather Resistive Barriers
Most sheathing types are protected from the elements by an exterior weather-resistive barrier (WRB). There are many brands of WRBs, some mechanically fastened (stapled) and some self-adhering (with a glue backing). Some newer types like ZIP System® or LP WeatherLogic® have a pre-applied weather-barrier coating, with tapes sealing the seams. The tapes are considered reverse-lapped as the upper edge of the horizontal seam tape does not have a layer lapping over it.
The sheathing layer can be used as an air barrier, too. This depends on which sheathing is chosen. For example, seams, perimeter and penetrations of plywood sheathing should be taped to qualify as an air barrier. This prevents wind and air movement through the wall system. Then a WRB needs to be applied to protect the sheathing from weather. The seams, perimeter and penetrations of the WRB can also be taped to create an additional air barrier.
Mind the Gap
It is a best practice to add a rainscreen gap between the WRB and the siding. This is a space behind the siding that allows some airflow and water drainage. This enables both the wall sheathing and siding to dry and greatly improves durability of the siding and paint. This can be accomplished with various products, including 1’x3’ inch wood strapping (furring), or plastic strips or mesh, like Cedar Breather®, Cor-A-Vent®’s Sturdi-Strips™, or CedAir Mat® or Mortairvent® from Maine-based Advanced Building Products. The rainscreen gap is one of the most important and simple systems to add when building. This should be common practice for any builder.
When using a plastic mesh system, it is best to use a self-adhered WRB to “self-seal” the siding fasteners. The adhesive in the WRB works as a sealant around the nails or screws used to hold on the siding.
If using more local wood materials is important to a project, choose a diagonal board sheathing, like locally milled pine shiplap or tongue and groove. Most historic homes were built this way. The boards are applied diagonally from the bottom plate to the top plate of the framing with properly sized nails or screws. This would then need to be covered with a fully sealed WRB. A WRB with a high perm-rating (a measurement of its ability to let water vapor through) is a good choice to make sure the sheathing stays dry.
I prefer either diagonal boards or CDX Plywood, because these materials process moisture well, allowing drying from the interior to the exterior. With plywood, you can tape the seams and apply a stapled WRB with proper laps to shed water. Add local wood strapping to complete the rain screen gap. You can also choose a local wood siding to go over the strapping.
Whichever wall and roof sheathing type are chosen, review the entire assembly as a system. Trapping moisture or allowing rain leaks will surely shorten the life of a building and lead to unhealthy indoor air quality. The goal is to build durable, robust structures that prevent mold and rot. This is accomplished by planning all the details of the assembly. Commit to building assemblies that will stay dry!
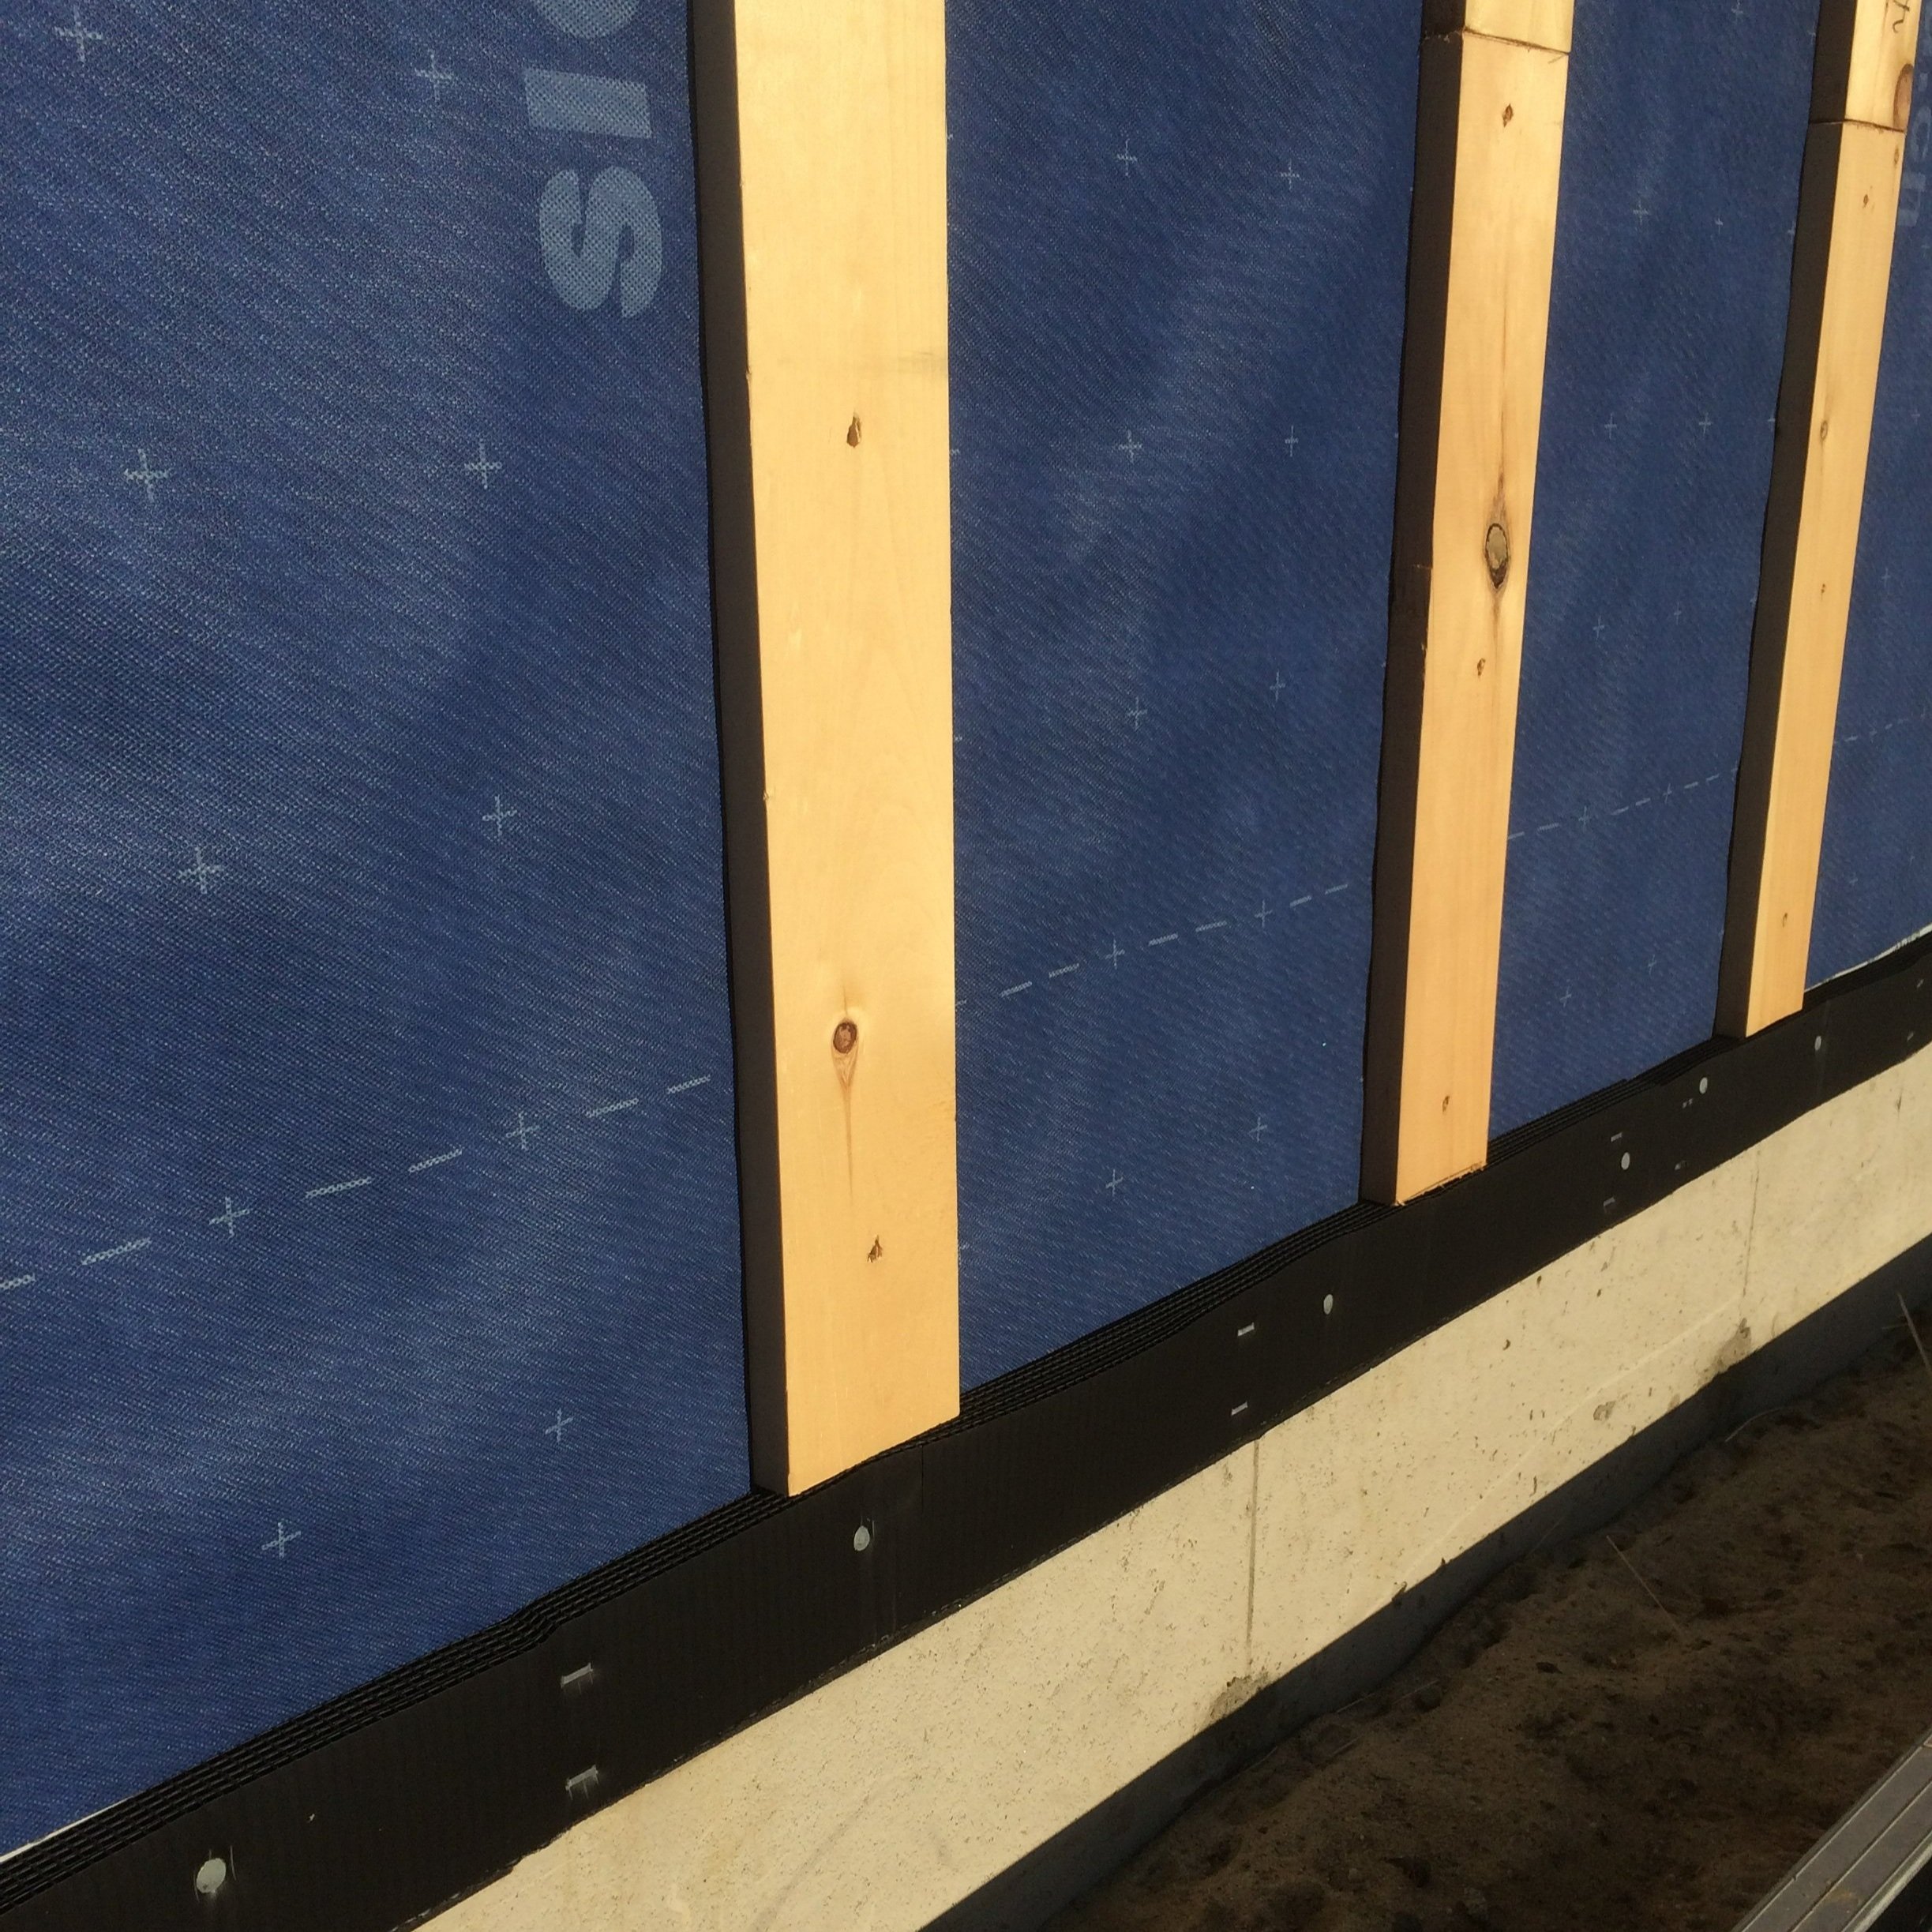
A close-up of the base joint (concrete foundation to wall sheathing) and vertical strapping for a rainscreen, showing Cor-a-vent® installed as an insect screen at the bottom of the rain screen vented system.

A worker installs Mortairvent® rainscreen material on a church renovation project in Houston, TX. COURTESTY ADVANCED BUILDING PROJECTS.

This article appeared in the Fall/Winter 2021 edition of Green & Healthy Maine HOMES. Subscribe today!